
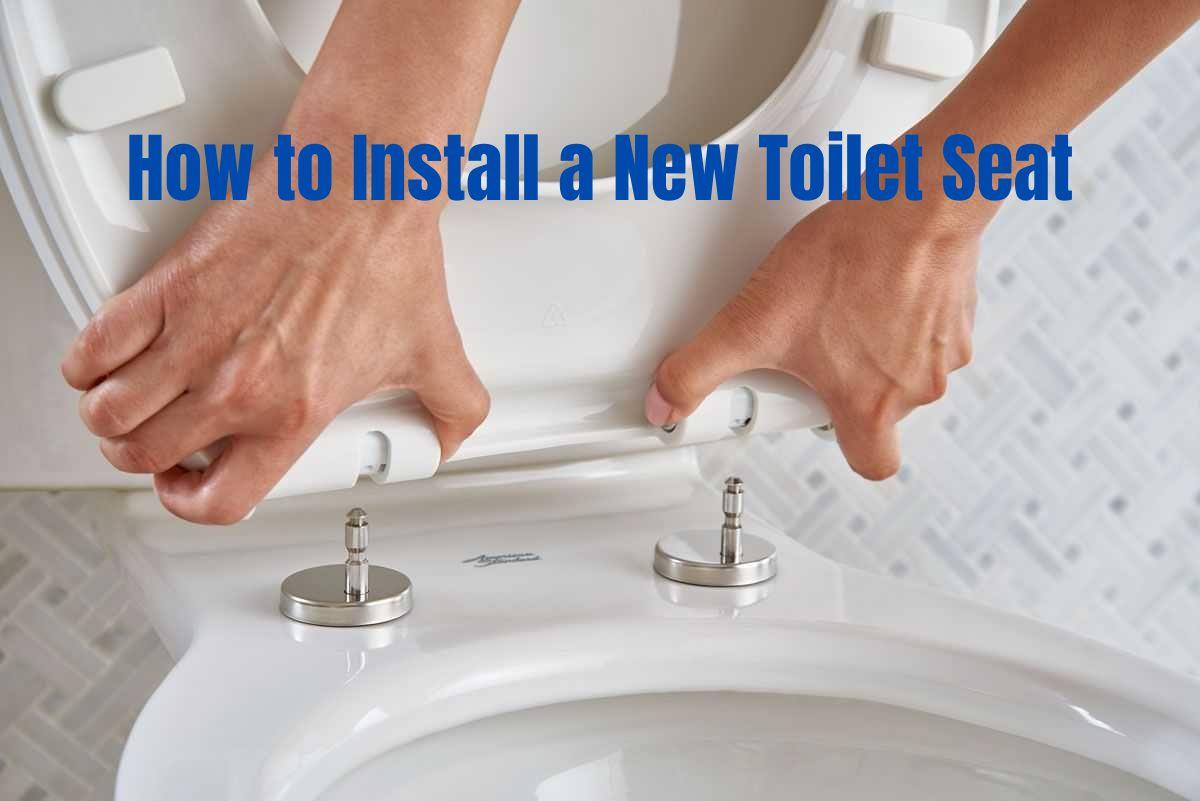
Replacing toilet seats is really a simple task. Learning how to install a toilet seat only requires paying attention to a few straightforward steps whether you need to replace old, broken hearts or want to give your bathroom a fresh style with one.
Use the hardware provided in your new toilet seat package to unbolt the old one before installing the new one. The only issue you might encounter is if the old bolts are stuck. But that issue can be solved with some elbow grease.
In your bathroom, installing a toilet seat is frequently one of the simpler and faster do-it-yourself projects. It only takes a few minutes.
There are various reasons to change toilet seats. These can include the chair having a crack or being broken, the fixtures possibly having failed, causing the rear to sway and move as you sit on it, or you desire a new look.
The seat will probably already be installed if your bathroom is brand new, but if not, this is another reason to install a seat in your toilet. We will go through the installation guide on installing a new toilet seat.
Quick Access
Can I replace a toilet seat myself?
Yes, it is possible to change the toilet seats all by yourself. For this, you need to have a little knowledge of plumbing, and that’s it. Still, the task is not very difficult for you if you don’t know anything about it. Just follow the given information and do the same. Replacing a toilet seat is easy for a person to do on their own.
Choosing the correct one
Not all seats will fit in all pots. To replace the previous one, you must make the appropriate selection. It’s not always simple to determine the size of your toilet bowl, let alone what size toilet seat would fit it. We’re prepared to assist. You need to choose the correct toilet seat if you want to learn how to install a new toilet seat.
Elongated or round?
Every year, consumers who want to know what size toilet seat to buy call our customer service staff. It’s a good thing they inquired because toilet seats can only be used with round or elongated bowls. A round toilet seat will not fit an elongated bowl, and the reverse is equally true.
How do we handle this?
Let’s get started by grabbing a tape measure and a technique to document what you discover. As previously said, there are two types of toilet seats: round and elongated. These two options are listed on the box of every toilet seat.
Calculate the distance between the mounting holes’ centers on the rear of the toilet using a tape measure. The length is typically measured at 5 12″, with a midpoint of roughly 2 34″. Measure from the middle point of your measuring tape to the outer edge of the rear toilet bowl rim.
The length of a round toilet bowl is roughly 16 12″. The size of an elongated bowl is around 18 12″. Order a suitable seat—round or long—for your bowl based on measurements.
ASSESS TWICE…
We advise you to follow the proverbial advice of the wise carpenter, “Measure twice, cut once.” Or “Measure twice, order once” in this instance. It serves no use to be overly frustrated when a few more seconds will allow you to be specific.
Therefore, if you’re looking to replace a toilet seat, especially if it’s been a while since your previous visit to your neighborhood home improvement store, look out for the following essential characteristics:
Toilet seats no longer bang shut when they close; instead, they close quietly. You can now choose a model with hinges that allow the center to lower gradually. What is the direct benefit of molded-in-place bumpers?
They offer solidity to the seat, stop the chair from scratching the toilet, and shut the toilet lid.
Toilet seats are now available in a variety of hues. A color selector tool is provided by one manufacturer, Bemis, to assist homeowners in sorting through the options. Apart from this, it would be best if you also took care of these things:
Cleaning
Replacing the toilet seat needs cleaning of the heart first. It is easier to remove a good seat for cleaning. Try to find a product that can be removed with just a screwdriver. To clean the center and the region surrounding the hinges, there are also quick-release seats that enable simple, tool-free removal.
Select a toilet seat with stainless steel or chromium hinge posts for durability; these posts won’t break or rust while holding the toilet seat in place. The majority of seats are made of plastic. Plastic seems more durable and easier to maintain, even if the wood is cozier.
Versatility
Some toilet seat styles come with side arms with slip-resistant grips for seniors, while “trainer” variants for toddlers come with built-in removable potty seats.
Comfort
If using a cold toilet seat in the winter makes you shudder, think about switching to a heated toilet seat.
Considerations for Safety
Although there are no substantial safety risks involved with changing a toilet seat, it’s a good idea to thoroughly clean the toilet before beginning the task. Consider using nitrile gloves if you want to keep bacteria and germs off your hands.
Instruments
The nuts that hold the toilet seat to the bowl must be removed, and they are frequently wing nuts. You will need a pair of pliers or an adjustable wrench to do this. A flathead screwdriver may also be required to pry off any nuts’ plastic caps.
Most of these tools can be found in a storage shed or bought inexpensively at most shops. Depending on the seat you purchase, it can have an attachment kit. You will probably need to buy the parts if you only replace the connections, such as the nuts, and not the entire seat. Apart from this, it would be best if you had the following things on how to install a new toilet seat:
- It is best to confirm this before purchasing a replacement because some contemporary toilets do not come with classic screw-on seats and instead use slot-in styles.
- A fresh toilet seat
- Small hacksaw, tongue-and-groove pliers, or a large screwdriver (for an old toilet seat)
- Pumice knife (for an old toilet seat)
- Sleeve wrench (for an old toilet seat)
Remove the old one
Let’s see how to remove the toilet seat. It can be challenging to work on your toilet because of its relatively small area. Therefore, remove the old one to replace the toilet seat. Fortunately, most toilet seats can be removed quickly by simply unscrewing the screws and bolts.
If the hardware holding your chair in place proves to be recalcitrant despite your best attempts, you can use a socket set, a hacksaw, or a drill to free it. By maintaining the seat through routine cleaning and replacing worn-out pieces, you can reduce corrosion and simplify the subsequent removal.
Method 1: Removing a Regular Toilet Seat
There are two types of toilet seat fixing. Both are given as:
If necessary, remove the bolt caps to access the seat fasteners. These are found where the seat hinges, at the back. Some toilets may lack plastic coverings for the bolts. If yours does, use a screwdriver or finger to press upward on these covers to unlock them. When removing the bolt covers, apply gentle pressure. Opening these requires minimal stress, and using too much power could harm them.
- Using the proper tool, remove the bolts. Bolts must typically be unscrewed with a regular screwdriver. Insert your screwdriver into the bolt head and crank it counterclockwise to undo the bolt while retaining the nut on the threaded end of the bolt head. Bolt heads can distort when screwdrivers are too small, especially if the bolt is made of plastic. Use the most oversized wrench that will fit the bolt head for optimal results.
- Using the proper tool, remove the bolts. Bolts must typically be unscrewed with a regular screwdriver. Insert your screwdriver into the bolt head and crank it counterclockwise to unscrew the bolt while holding the nut on the threaded end of the bolt.
- Bolt heads can distort when screwdrivers are too small, especially if the bolt is made of plastic. Use the most considerable screwdriver that will fit the bolt head for optimal results. [4]
- From the toilet, remove the seat. Gather all loose nuts, bolts, and metal or plastic hardware that came with the heart. This includes the bolt covers. To prevent them from becoming misplaced, place these little parts in a sealable plastic bag and glue them to the seat. Now that your toilet seat has been removed, you can add a new one.
Method 2
This is method two of how to install a new toilet seat. Apply penetrating oil to corroded metal hardware to lubricate it. Like WD40, penetrating oil is used to restore rusted-out metal parts. Spray this oil liberally on metal fasteners, such as nuts and bolts, to lubricate them and make removal easier.
- Allow the penetrating oil to penetrate the hardware’s tight areas and dissolve corrosion for 5 to 10 minutes.
- If you don’t have penetrating oil on hand, you can create your own by combining a mixture of 90% vegetable oil and 10% acetone.
- Use tape to affix the seat. You might push or jostle the seat when utilizing numerous stubborn seat removal strategies. Depending on your circumstances and the fasteners used to connect the center, you may tape the lid and heart together in a closed or open position.
- To preserve the toilet’s ceramic and the seat’s plastics as well, you could wish to tape a cover material, such as cardboard, in place if your circumstance calls for you to drill or cut off bolts to remove the seat.
- Employing a socket set, remove the bolts. You might be able to fit your socket wrench straight onto the nuts keeping bolts in place in some circumstances. You might need a deep socket or socket extender to reach the nut on some toilet designs. To release the nut, forcefully turn the socket in a counterclockwise direction.
- Use your socket wrench to provide constant, moderate force. If the nut still doesn’t budge, intensify the pressure with your twist to high for a brief period. Repeat this numerous times to get the nut to come off.
- When you try to remove the nut and bolt, the bolt can turn along with the nut if they are already loose.
- Make quick work of stationary hardware with a hacksaw. Take a broad knife, such as a putty knife, and place it so that it covers the toilet’s porcelain around a bolt’s head. This will shield your eyes from unintentional dings. Use the hacksaw to gradually remove the hardware holding the toilet seat to the bowl. This procedure can take some time.
- You might need to cut through the hinge bolts and remove the chair with the bolts attached, depending on the hinge of your bathroom and the hardware holding it to the toilet. The bolts can then be cut through.
- When using a propane torch to loosen the nuts, proceed with caution. If none of the other methods work or you don’t have enough space to drill through the bolts, you might try using a propane torch to loosen them. Put a piece of metal between the burner and the porcelain to prevent damage using a low flame setting. After heating the obstinate bolts for a little while, try using vice grips to loosen them.
- When using a propane torch, be careful not to burn yourself and keep a fire extinguisher close by.
For the next step of how to install a new toilet seat, follow the given steps:
New seat installing
Let’s see how to install a new toilet seat. Repeat the following steps to install the toilet seat:
- Install the replacement seat. Take it out of the box. The seat’s hinges will already be installed. Place them exactly where the old seat’s hinges were.
- Bolts and nuts will also be included in the box. It might also come with plastic bolt covers. Place this hardware aside.
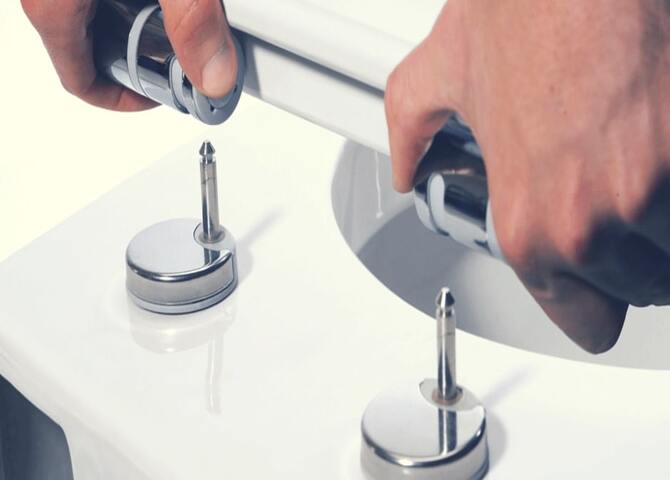
- Place the bolts with a drop. Grab a bolt and hold it. There will be holes in the hinges for the bolts to go through. These holes will be situated immediately on top of the holes on top of the toilet bowl since the toilet seat is installed exactly where the previous heart was.
- With the bolt head on top, slide the bolts through into the holes in the hinges and bowl.
- Not to worry. The bolts’ heads prevent them from falling completely through the holes.
- The bolts are threaded onto the nuts. Choose a nut from the group. Take a look at the toilet bowl’s one side. The end of one of the bolts should now be visible, poking through the bowl’s top. In a clockwise direction, tighten the nut onto the bolt as much as possible by hand. To draw the nut, even more, use your adjustable wrench.
- On the opposite side of the toilet, continue with the other nut.
- Alternately, snap the seat into position. Some toilet seat styles don’t require bolts to go through the hinges. Instead of pushing the bolts through the hinges first, you should drop them into the holes on either side of the toilet bowl. Then use nuts to secure them. The seat’s hinges will slip over or snap into the bolt heads.
- If you have this kind of toilet seat, make sure you reread the directions.
Change toilet seats with the above instructions.
How do you tighten a toilet seat with no access underside?
Replacement of toilet seat includes tightening of the new center. You might feel better knowing that, despite the bolts possibly not being in a prominent location, it is not difficult to pull the toilet seat even without access to the underside.
Many toilet seats contain tiny access holes on the bottom that have been covered up so you can’t see them. Other varieties of toilet seats also exist, and while they might have somewhat different connectors and holes, you can still figure these out with some help.
Let’s first analyze the types of tools required for this endeavor before we go into our step-by-step instructions for tightening toilet sets without access from underneath.
Recheck the toilet in step one.
It would help if you first rechecked for holes around your toilet because most typical bathrooms have them somewhere for underbelly access. The seat hinges are a specific spot to search because there may be unseen buttons that, when pressed, will remove the lid and reveal the fastening bolts and screws.
Some toilet seats have unique covers that you may need to push aside or pry up to access the fittings underneath. These covers shield the fixing bolts from anything that might harm the locks. In this case, carefully search for a piece with a round cut to locate the bodies.
Step 2: Reposition the chair.
Reposition the chair for toilet seat replacement. Once you’ve found the toilet seat bolts’ underside access, you can adjust the seat before retightening everything. You should center your heart if you discover it is not in the proper position. Clamps can be used to assist you in securing it in place.
Third step: Tighten the bolts
Start tightening the bolts once the toilet seat is positioned in the center. The best tool for the job would be a flathead screwdriver, but if you think another head would work better, go for it. You don’t want to harm the bolts or reduce their longevity. As much as you can, tighten the screw until it doesn’t turn.
To get a tighter grip on your toilet seat, a specific wing nut can be adjusted at the bottom of some toilets, such as soft-close toilets. In these circumstances, you can use a set of pliers to hold the nuts in place while using a screwdriver to compress the bolts. The wing on the nut will lock the bolt into place and stop it from rotating back on itself. When the seat seems secure, tighten the bolt one more time.
Check the tension in Step 4
Your toilet seat should be firmly in place by this point. However, double-check the tension by tapping the bolts to see if anything moves before you put your tools away. Retighten the bolts as much as you can if something happens. Close the lid after ensuring nothing prevents it from shutting correctly if everything appears secure. You are now done!
Frequently asked questions
Are toilet seats universal?
Yes, toilet seats are universal. They can be used anywhere with different designs, patterns, and colors.
How do you remove a hidden bolt from a toilet seat?
You must find the hidden bolt and then use a screwdriver to remove it.
Conclusion
We hope that these steps to install a new toilet seat are clear to you now. These are the few steps to replace the old toilet seats with new ones. Try to install the new toilet seats only if you are very confident. If you are stuck at any part, keep everything aside; otherwise, you will lose everything. But if everything is going smoothly, then keep going. You will install your toilet seats with the above instructions.
M. D. – In your bathroom, installing a toilet seat is frequently one of the simpler and faster do-it-yourself projects. know more about How to Install a New Toilet Seat